176412_144832918910682_6673036_o

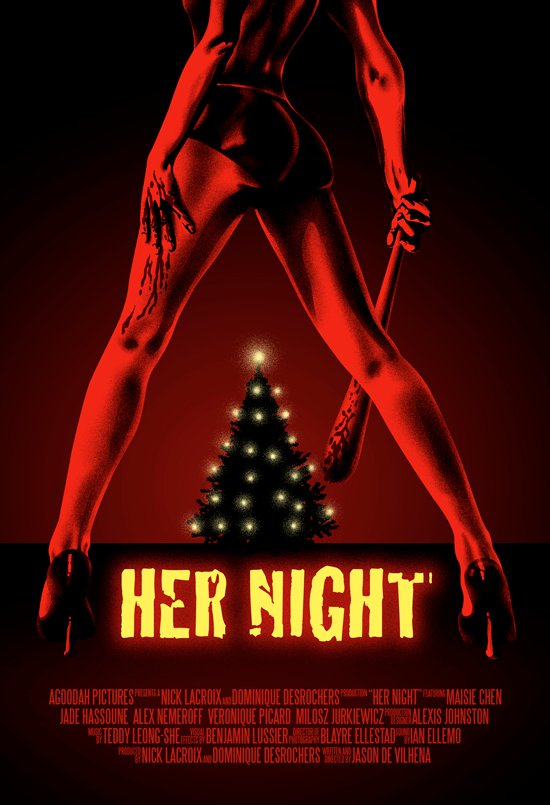
A couple of years ago I worked with a clever film crew in Montreal under the talented and terrifying direction of Jason De Vilhena. They had seen my wedding cinema work and thought I could bring the proper visual aesthetic to their horror movie. Don’t try and make sense of that. None-the-less I was thrilled to have the opportunity and immediately signed on to the team. This was my first real narrative production as I virginally walked onto set for the first time as a Director of Photography, ready to create drool-inducing visual imagery. Working alongside Jason De Vilhena and Benjamin Lussier, we collaborated throughout the roughly twelve day shoot - encountering and conquering several challenges together and ultimately producing this wonderful short horror film which really does a great job at scaring your pants off! I’m so proud to have been apart of this as not only have I launched my creative interests in the narrative form, but I made some really great inspiring friends who, initially and over time, taught me a lot about myself and the world of film production. It was incredibly demanding, having worked 24 hrs straight on day 1, but the satisfaction and sense of accomplishment greatly out-ways the incredible lack of sleep and Redbull we endured throughout production. This was way back in February of 2009 which seems soooo long ago now! Anyways the film released and went through a couple small festivals and had a pretty decent reception.

Now we’re seeing Her Night resurfacing for another festival in Montreal called the Montreal Comicon Horror Fest! Meaning my little baby from 4 years ago is still making it’s way around the cinema world and once again we’re (the production crew) getting a chance to showcase the product of what was a pretty huge investment for most of us. This time Her Night will officially premiere online, so you can go to the website and check it out. Here’s the Facebook page for you to get more details. It’s amazing to screen your work in-front of a large body of people. The feedback is what I live for. Having someone take time out of their day to enjoy creative efforts I worked on is very satisfying. I’m very thankful to the whole Her Night crew for letting me share in such a wonderful collaborative effort.

*UPDATE - For the first time EVER Her Night is LIVE online in it’s full form! Check it out below :D


It’s 2013 and I still find myself using the age-old method of ingesting DSLR clips to the external drive, converting through MPEG streamclip, and then importing to my NLE (preferred by far is Adobe Premiere CS6). These are the teachings of the legendary Philip Bloom which were presented three years ago, and to this day (in most cases) I still find them to be the most effective. Below is the outdated tutorial, which still works fine:

With Adobe Premiere CS5.5 & 6 handling pretty much any format you’ll need natively, all of this converting to Pro Res LT, Pro Res, Pro Res HQ, Avid DNxHD, Cineform, etc…. isn’t absolutely necessary. You can take your footage directly from the camera and go straight into the edit. H.264 is not longer un-editable. This is great if, like me, you need quick workflow for incredibly demanding turnaround times (Same Day Edits anyone?) which sometimes can be endangered if having to convert for hours on end. However, regardless of how new and improved your computer is, you’re still going to have a much more enjoyable edit if you do convert to a video format more suitable for editing. I run a MAcbook Pro Retina 15inch w/ 2.7ghz quad core, 16gb Ram, Nvidia GT 650M Graphics card and 500gb SSD. It’s blisteringly fast, thin as a duo-tang just beautiful to use. However, with all these juicy specs, I still run into a little discomfort when throwing four hours of H.264 unto a timeline… especially after you start applying effects and grades to the image. Your render and export times go way up and the overall fluidity that an editor desires simply isn’t there. My Retina will convert a whole batch of dslr footage in MPEG streamclip at a very impressive rate so I simply do not hesitate to get this step out of the way. My top two choices for codecs would be Pro Res 422 or Avid DNxHD. Both of which offer lossless conversion with decent file sizes… DNxHD being larger than Pro Res 422.

The beauty of these two formats is that they convert a messy h.264 image into a form easily understood by the computer. Once solidified in it’s new element, adjustments made to the image (corrections, grades, effects) come across cleaner and the image holds itself together much better. This may be why some people have said Pro Res enhances the quality… which it doesn’t directly, but it does enhance the computer’s ability to look at the image properly. An H.264 image is best compared to a tangled ball of string. Very difficult to sort through and tedious to untangle. This is how the computer feels when looking at an H.264 image. Since the compression is so great, and the images have been compressed as strings of multiple frames (rather than as individual frames), your computer is expending a huge amount of power just to play it for you. You’ll definitely hear and feel your computer heating up when working with H.264. When you convert to Pro Res 422 or Avid DNxHD, you’re taking the tangled ball of string and un-tangling it for the computer. Laying all the string down neatly so that each image can be viewed and altered with minimal effort. When your system can view video images in a sequence the processing power can be focused much more efficiently. And the render and export times are very pleasing as well.

Other conversion software out there is Canon EOS E1 plugin for FCP 7, and also Magic Bullet Grinder is nice. But I still find MPEG Streamclip is faster and also the pre-organization available in streamclip is so much more advanced. Magic Bullet Grinder allows to you create one giant batch list from one source folder and convert to Pro Res LT, 422 or HQ into one destination folder. What I don’t like about this is that when you have multiple cameras from multiple scenes, you’d like to organize the footage as such so you can import your pretty folder organization directly into your editor. In MPEG Streamclip you are able to customize the proper destination for each group of video clips so that in one process you can convert and organize everything. Grinder is missing this ability but hopefully will receive a nice update!


First of all, if you’re going to read this post it must be already assumed that you’re not a big time professional colorist sitting in your overdeveloped basement studio layer with an 100inch projection screen connected live to your editing monitor on your $30,000.00 outdated Mac Pro, cause this post is not going to do anything for you. Also you’ll pick up on my less then expert level of explaining the ‘scientific’ process that is color correction so I’d appreciate your silence on this one as I reach out to those who can benefit from a bit of guidance presented in ‘average cinema joe’ form.

Here’s the thing with color correction - it’s very subjective to the user and a quality image can be achieved in many different variances. So I may color an image in a method that brings me total bliss and a divine feeling of success while you have a peek and right me off as someone who doesn’t understand how to use the equipment - this is how the artistic community works, and will continue to do so. What you as an aspiring wonder-kid should be doing is focusing your energy on creating work that you’re happy with, and possibly your clients as well. To accomplish these two things you’ll need to first understand the rules of color correction, so you can break those puppies down, and secondly understand that your de-sensitized version of grading, brought to you by Magic Bullet Looks, NewBlue FX, FX Factory Pro, is only beginning to scratch the surface of the world of the colorist - a world that since uncovering has caused me sheer terror.

FX1-AccuChart-60i

Color correction is stage which must always be situated at the end of the post-production roadmap. Though in some circumstances a colorist may ride on set with his portable Davinci Resolve workstation and hand the editor already pre-graded clips, this probably isn’t the case on your sub $5,000 project. That’s just fine and nothing to feel inferior about. Never stop dreaming. Usually when you get footage off your camera, onto the external hard drive and finally into your NLE, it’s best practice to focus solely on the placement of shots for the purpose of telling the most efficient story for the audience. It should be nice to know that you can break-up your workflow into tiny little ‘to-dos’… kind of like the list you have sitting in-front of your face all day at work that helps you achieve and maximize your potential in life on a daily basis, right? Color correction is best left for ‘picture-lock’. When you and your client have determined, after days of disturbing recommendations and alterations, that the edit is in it’s best possible form, now it’s time to start looking at the polishing stages which can be color, audio, and maybe some jazzy effects that you’d like to apply with your magic lens flare plugin that you bought.

Now tell me. Are you one of those gals who applies an effect to an image, adjusts it so it looks you know, pretty cool - then applies this effect to the entire project? If so then I suggest you reflect your pricing to say as much - this is lazy and definitely does not qualify you as a colorist, so take that off your business card. There are many aspects about color that a colorist needs to be fluent with before attempting to correct an image. Simply moving the color wheels around until it feels good will 90% of the time not do justice to the hard work the production crew has put into the process. Coloring a sequence of images is very much the same as scoring a film or tv production. You’re gathering the overall message and emotion, to the best of your ability, and applying tweaks which you believe not only compliment but enhance the audience’s reaction during their viewing experience. If you’re looking to maximize your production than you’ll take this seriously - imagine a movie with a copy and pasted theme track over every one of the vastly different cinematic moments?

blg_wheels_safc_1-1

Newton’s Law has a very special place in the world of color correction as when you make an adjustment on your color wheel, or curves, you will always be both adding and subtracting color values in your image. For example, when you add greenish tint you will also be subtracting red or magenta tones. For every action there is an equal and opposite reaction. That being said it’s crucial that you make adjustments as subtly as you can to avoid pushing or pulling the image to far in any one direction. Another key element is to become familiar with the various scopes you have at your arsenal. Typically you’ll be able to utilize a waveform monitor with luma and RGB Parade modes, a histogram, vectorscope and maybe 3d color space model. If you can become comfortable with at least the waveform monitor and the vectorscope, you’re good to go. The waveform monitor is very useful in luma mode to establish the appropriate exposure and contrast - ensuring that your published work will be within the legal limits of broadcast. Even if 99% of your work will never make it on a television broadcast, it’s good practice to legalize your exposure values to ensure a precise display on a majority of the screening platforms out there…. if it’s legal it will have a better shot at remaining in it’s intended form -this is good. Below is the Ansel Adams exposure chart which is amazing for skin tone adjustments - have a look.

ansel adams

If you’re using FCP X or Premiere Pro you should have a waveform monitor reading at 0 - 100 IRE and likely a setup at 7.5 IRE. The higher the value the higher the luminance is in the corresponding area. If you placed the waveform monitor on top of your image you would see all the squiggly lines correspond very accurately with the brights and darks of your image. If you’re inside a dark room shooting through a window revealing a bright sunny day, framed with the window in the centre, you will see a very steep mountain of squiggly waveform lines in the middle of the monitor, with very low measurements to the two adjacent sides. I know this doesn’t all sound that technically sound with the ‘squiggly lines’ and such, but it will hopefully make sense when you get into your software. For legal limits you want your highest exposure (whites) to fall a little under 100 IRE and your minimum exposure (blacks) to fall on or above 0 IRE. When I was referring to the 7.5 IRE setup, that is a setting you can apply in Premiere and I believe FCP which prevents the blacks from crushing below 7.5 IRE - you can build a quality ‘crushed black’ look without going below 0 IRE… fyi. Start your correction with in the mids (gamma), followed by the highlights (gain) and shadows (offset). Always start with the mids. The mids are $$$…

blg_wheels_safc_1

Once you have appropriate exposure and a deliciously filmic contrast across your image, you’ll want to switch your waveform into RGB Parade mode. This will divide your waveform monitor into three separate sections representing RED, GREEN and BLUE… in that order from left to right. Generally when you look at an RGB Parade you’ll see each color is at a slightly different level. This is because on average your image will not have an equal amount of red, green and blue - You will normally only notice equally measured levels between R,G and B when the image contains blacks, greys and whites. So knowing that, a very effective way to white balance is to figure out which parts of the RGB Parade correspond to the black, grey and white areas of the monitor, and use your adjustment tools to level the color values in that area. The tools you use will either be color wheels or curves. If using color wheels with offset, gamma and gain, you’ll need to play around with all three to properly align the values to obtain proper white balance. To focus alterations in the bottom third of the waveform monitor utilize the OFFSET or SHADOWS tool. The MIDS or GAMMA will focus on the middle third of the waveform, and the HIGHLIGHTS or GAIN will focus alterations on the top third.

Screen Shot 2025-01-11 at 11.58.40 PM

The vectorscope is essentially a color wheel with a digital presentation of all the points of hue which are found in the image. Whichever direction the points on the scope are leaning towards represents a specific hue and saturation element. The little clusters form mountain-like shapes similar to what you will see on your waveform monitor, but this time they’re representing hue and sat, rather than exposure and contrast. The vectorscope is used to determine accurate color representation in an image - many vectorscopes also have a ‘skin tone’ line running on a slant from the oranges to the cyan area which acts as a point of reference when adjusting for a standard cinematic skin tone. Skin is very tricky as the acceptable hue range is very small. By acceptable I mean establishing a range that doesn’t make a person look too hot, upset, unhealthy or terrifying. Skin is very reflective of moods and it comes across vividly in your monitor. You want a familiar looking skin tone so that your audience isn’t distracted by thoughts of “what the hell is wrong with this person??”. Even in a heavily graded image that obviously isn’t reflective of ‘real-life’ standards, secondary color-correction is applied to bring the skin tones back to an acceptable and recognizable hue. More on secondary corrections in just a moment. The vectorscope is great when matching a shots for accurate saturation and hue. The average vectorscope will have amplitude scales of either 75% or 100%. 100% is the maximum composite amplitude level capable in a digital broadcast and is not legal for broadcast, so it’s a standard to have your scale set at 75% - this is a level that you should never exceed…. otherwise you’ll be ridiculously over saturated.

Secondary Color Correction is one of the most interesting aspects of the color process. In this process and with the right platform and tools, you are able to manipulate specific values in a selected tonal range to achieve a very focused correction. For example you’ve shot a lady holding a green apple and you want to turn it into a red apple. With the proper technique you can isolate the specific color range of the apple and adjust the hue as you so desire. Sometimes this is done with an eyedropper tool, otherwise you’ll be using HSL sliders. To further attack your grade with secondary corrections, most platforms allow you to create a shape mask which can focus corrections in luma and color over specific areas of the image… vignettes for example. The other common need for secondary color correction is to revive memory colors. Memory colors are colors of certain everyday things that, if off in an image, wont feel right to you. Bricks, grass, sky, water, skin, sand… each of which you probably have a pretty good memory for what they should look like. When you grade an image too far, for example you’ve pushed your midtones too far into purple, you’ll need to isolate certain areas of the image containing subjects which should have memory colors. Bringing these sections of the image back to a somewhat relatable color will greatly help the overall image you’re creating and give a very sexy look.

vectorscope memory

A couple excellent books I’ve read and highly recommend are “The Colour Color Correction Handbook: Professional Techniques for Video and Cinema” by Alexis Van Hurkman AND “The Art and Technique of Digital Color Correction” by Steve Hullfish. There is a wealth of information in them which will greatly enhance your effectiveness as a colorist. So much information in fact that you’ll probably end up overwhelmed and go straight back to Magic Bullet Looks. Color correction is a very scientific art which takes far more dedication, knowledge and experience than I had ever imagined. Knowing now what I do, I’ve realized that I will never be a true colorist (i shouldn’t say never…). It’s a very specialized field requiring extremely specialized skills, workstations and minds. I know a few dozen people off the top of my head who can grade a nice DSLR image and turn a few heads but when you place their work next to a real colorist’s (watch The Master), it’s simply in another league. The consistency in shots, contrast in concentrated areas, smoothness in shadows, perfect skin tones, complimentary hues… it’s insane. It’s such a challenge to be good at this but so incredibly crucial to pushing an image to it’s full potential.

the_master_paul_thomas_anderson131

Through all my trials, studies, experimentations and failures, I’ve come to the conclusion the color correction (grading) is an art form that will always vary from one artist to another. Some of the best grades I’ve seen seem to have the smallest adjustments made to them. Shots seemingly ungraded which might have captured such a naturally beautiful scenario. Subtlety is the key to good color work. Learning to hold back your eager coloring fingers and concentrate on balance and enhancement.

Since becoming fascinated with this specialized field I’ve experimented with many color correction platforms. Apple Color, Davinci Resolve, Adobe Speedgrade, Synthetic Aperture Color Finesse… All incredibly powerful tools with secondary color correction abilities. These are heavy duty programs which can produce fabulous results when used properly. Speedgrade so far has stood out to me as a favorite, though on my 15inch mbp monitor it’s somewhat challenging to work on the very compressed user interface. But having familiarized myself with all of it’s functions, limitations and many strengths, I’ve noticed a new window of visual opportunity. Most of these color platforms will do the same thing in a very similar manner. It’s essentially up to you to choose which one will suit your workflow the best. If you’re looking for something a little less intense that will still provide you with powerful tools, try Colorista II. Designed by Stu Maschwitz, Colorista II has essentially all the same tools as the ‘big boy’ tools listed previously. It’s actually my go-to plugin for regular projects ;)

If you’re interested in becoming better with your grades, read the books I listed above and get to work. You’ll soon realize that even with all the information in the world, you’re still gonna need to go through a large trial-and-error familiarization stage which could last 10+ years. Especially with all the varying codecs, cameras, monitors… there are so many different deliverable formats too. This is a very interesting field which I hope to excel in further and expand my confidence with. I hope you got something out of this. If you have any questions please leave me some feedback and I’ll get back to you. I hope this has been ridiculously inspiring.


*geared towards DSLR video*

As an avid camera enthusiast and loyal member of the Canon legion, I’ve experienced many a glorious moment reading the new release specs on the latest and greatest. Foaming at the mouth over the possibility at being a better photographer / cinematographer, if I could only find a way to sell everything else in my home to get that new piece of equipment! Thank god for craigslist and Kijiji (Kee-jee-jee) who also give me the chance to spend more money to make the sale quicker ($15 for a top ad… great!). Since 2009 when that ridiculously awesome Canon 5D Mark II came out, myself and millions of others suddenly became obsessed with the image possibilities from the full-frame video capable DSLR. Canon hadn’t even intended on this video function being something that really ‘caught-on’, but oh baby did it ever! Largely in thanks to mutually appointed mastermind DSLR users Vincent Laforet’s Reverie and Philip BLoom’s many videos of people staring into a camera like Sofia’s People. These two guys really jump started the phenomenon and drew a massive crowd of followers and both previously and newly interested into cinematography. Sometimes there are things in life you love and respect and understand are out of your reach… this new 5d mark ii shattered barriers for low-budget productions looking to create a visual imagecapable of holding an audience’s attention! Nevermind having a minimal understanding of composition, storytelling or lighting techniques (amongst many other important traits and talents), these new DSLR super-body owners were suddenly able to draw in massive amounts of viewers who were drooling of the silky smooth buttery pop image of a mark ii w/ a zeiss 50mm 1.4 - I remember the first time I watched Sofia’s People, about a week after purchasing an Sony PMW-EX1… boy did I sell that baby quick! Couple days later I find myself a minority walking through the Caribbean festival filled streets of Montreal with my mk ii and 24-70mm filming booties shaking and drums beating! It was like a ticket to hollywood, and for many I believe it literally was! Those with talent but no means to share it now had their means.

Sofia’s People from Philip Bloom on Vimeo.

With the crazed popularity of these new products also came the crazed production of newer versions and extensions and add-ons and kits and brackets and lights and poles and all these things you were told you NEEDED to really make it work right… If you’re going to buy the mk ii or the 7D, 60d, t2i, 1dmkIV… you’ll need the manfrotto support, otherwise it’s hopeless kid. And the reviews and stories told about the glass to buy and the microphones needed, the $5000 steadicam setups… don’t forget the need for editing software like final cut pro or Adobe Premiere. Take a look back at the history of these companies and analyze the popularity boost from 2008 till now. If your reading this now and you’ve a bag at your feet compiled of a high-end Canon DSLR, zoom h4n, expensive Rode mic, sennheiser lavs, zacuto or redrock micro support, a set of ridiculously expensive prime lenses - and you suddenly shoot weddings or corporate vid’s (which we all know you just say to sound cooler but you actually just shoot a few weddings) - chances are you’re a victim of this incredible advertising bomb that’s nailed you right in the ass and probably taken you for thousands of dollars more than you really needed to invest. I’m hear to tell you that this is absolutely unnecessary! I’m going to break down the what your kit should look like if you’re getting into a career as a DSLR based cinematographer. The truth is that the affordable flare is MUCH more affordable than you may realize and if you’re smart you probably wont mind saving a few thousand dollars while still attaining the same quality level as the ‘baller shooter’ running around with Zeiss CP Primes he bought with his inheritance money. Before I get to my list it’s important you really understand that all this gear, camera, lenses, monopods, steadicams, they’re all just tools there to help you achieve your ultimate goal of telling an interesting story through visual and audio means. Your primary focus should not be making a shot work with a record low level of light… this may get a couple views but it’s not an everlasting presentation. How much further will you get with the $4000 Zeiss lens on your 1D Mark X than say Mihai Malaimare Jr. (Cinematographer for The Master) would on a Flip Mino? I’m willing to bet though severely overmatched tech-wise, Mihai would creatively dismantle your visionary soul with that dirty little 640 x 480 (oh yes the SD version) image while you’re mesmerized by your focus pull on a doorknob.

The Villa - Shanghai (5dmk3) from Blayre Ellestad (Elle & Be) on Vimeo. Video created on MK III with Tamron 24-70mm, manfrotto monopod, glidecam 4000 HD.

Spend your efforts on the creative process. Take inspiration from others as I always believe your best ideas come from other people, but at the same time don’t limit yourself by cutting off your imagination. You’re the only one who can come up with the shot that only you can think of. DSLR video equipment has become another addiction, in a world full of them, driven by the illusion of affordability. Let’s make a quick list of the camera bodies alone that I’ve gone through in the past 5 years:

Panasonic HMC-150, Sony PMW-EX1, Canon 5d Mark ii, Canon 7d (x2), Canon 60d (x3), Canon 1D Mark IV, Canon T2i (x2), Canon 5D Mark III

It breaks my heart (an my girlfriend’s as soon as she reads this) that this has been roughly $36,400 of experimentation and brainwashing over the years… and that’s on bodies alone. Don’t forget how pricey glass can be. Now it should be said that I am a major geek when it comes to this stuff and there’s a very good chance your level of financial control is well, on another level, but there are many others out there like me who are chasing the equipment that will give us an edge over the next guy and I think it’s very important that I share my thoughts with those of you who will read this and be humbled by what you have or what you can afford. You should know that you can be great with less than great equipment. You should know that less than great equipment can become great if used greatly!

Here’s my list of a GREAT starting kit for the new kid on the block soon-to-be-famous DSLR cinematographer:

1. Canon t4i ($599.99 but cheaper on KIJIJI or Craigslist) - I’m telling you if I’m shooting a gig with a 1D Mark X and it fails, I will take your t4i and happily finish the shoot with confidence and grace. This body has all the video capabilities that you need to comfortably obtain remarkable video images. Add in a flip-out LCD and now you can shoot from incredible angles impossible with other bodies. This body has an EF mount and if you really feel the need you can mount your $4000 Zeiss lens and shoot-to-kill on this puppy. The SD card is super handy too as it slides neatly into your brand new macbook pro!

2. Canon primes 20, 35, 50, 85 ($500, $420, $430, $520 but please check KIJIJI or Craigslist) - You’re a fool to think this wont be satisfactory as a start-up kit or better yet a professional kit! These are lenses I utilize constantly. Lenses I’ve seen world-class photographers use on the regular. 20mm 2.8 (32mm on cropped sensor) is great as a wide lens on a t4i, 60d or 7d as they’re all cropped sensors (giving you a zoom factor of x 1.6). It’s a nice sharp lens which I find works great for establishing shots and steadicam work. // The 35mm 2.0 (56mm on cropped sensor) has a great feel to it. On a t4i this is roughly a 50mm lens which is known to be most similar to the human perspective . Beautiful sharp lens especially when stopped down to f4-5.6. I LOVE the look of a 35mm when you get right up close to a human subject (be brave). // The 50mm 1.4 (80mm on a cropped sensor) is freaking gorgeous at 1.4! Yes it’s not tack sharp like the 50mm 1.2 ( $1700 before tax) but it’s buttery bokeh is just wonderful to look at… and I don’t find the sharpness to be all that problematic. If you stop this lens down to f4-5.6 (on a full frame body) it is tested as being WAY sharper than the 70-200mm Mk II Canon ($2300 before tax). It’s a fun lens and you can really get some lovely low light shots with it as well! // the 85mm 1.8 (128mm on a cropped sensor) actually came into my life recently after shooting with my good friends Tim Chin Photography who had it on one of their bodies and forced me to give it a run saying “it just makes people look better!”. That’s all that I needed to hear… give it a test. At 1.8 you’re laughing. Brilliant budget lens.

3. Manfrotto 561B1 Monopod ($350) - this was the single best investment I ever made on my kit. The portability, flexibility, and potential is limitless. You can move around like a ninja and even add movement to your shots (smooth lean) once you get experienced. This is my go to piece for camera support and will be yours soon hopefully.

4. Rode Mic ($250) - this model I’ve linked has been another go-to for me. It has a built in lowpass filter to help you beat the wind outside, and also two volume presets to raise or lower the input level depending on your situation. Usually I leave it on it’s standard setting as it’s good for most all around scenarios. If you are in a rock concert you may flick the switch to -10 and on the opposite end if you’re barely able to hear somebodies whisper quiet speech you may bump it up to +10. This mic is designed to cooperate with the DSLR auto gain system and has given me great results.

5. Zoom H4N Audio recorder and Sennheiser G3 Wireless Lav ($280, $670) - This setup is impeccable with it’s wonderful ease-of-use, portability and amazing quality. It has a fairly decent range too but always be sure to keep the receiver and transmitter as close as possible for best results. The Zoom is a sturdy piece of tech that has NEVER failed me. You can fit XLR, 1/4 inch, and stereo inputs into this baby. The Sennheiser are still pricey but audio is something you can’t take too many shortcuts on… if you mess it up on the intake you’re done son. Don’t feel bad about the G3 as you can literally take your production value to the next level with the power in this puppy. Make sure you become familiar with the frequency setups and be sure to scan for a safe channel when entering new shooting locations.

6. Glidecam HD 4000 ($690) - For a DSLR shooter with a standard setup you’re definitely overkilling it if you invest in one of those gigantic steadicam rigs. I’ve used many and laugh at the comparison in ease-of-use vs quality ratio when comparing the big rigs with the glide cam hd 4000. A t4i with prime 20mm on a glidecam is light as a feather. I’ve used it on 3-4 minute music video takes (which is still tough) and produced results that you might swear were from a major steadicam rig. It’s all about balance in the setup and learning to walk properly. Your arm is the spring so loosen up tin man. Another great thing about this is that you can move it in the same manor as a slider (kessler, cinevate) or a jib so essentially you can get a steadicam, slider and jib all in one with the glidecam hd 4000. It’s lightweight, comes apart to be very portable, and it’s not going to cost you a month’s salary.

This is my start-up list for the DSLR cinematographer who is serious about having great equipment to establish herself as a capable player in the game ready to tackle a professional project and serve up a high-calibre product - while saving some serious cash that I threw out the window. This entire kit can be purchased today for $5000 and likely cheaper if you go through Kijiji or Craigslist. That’s still a hefty investment but your are completely ready to go at that point. There are a few extra costs in batteries and memory cards (I recommend Transcend) but you are going to save yourself a lot of pain and heartache by knowing exactly what you need and limiting yourself to what you now know will get the job done, without running around like a maniac spending a years salary on toys. Get your kit and start focusing on the important stuff. The creative aspect, the storytelling, the many other details that are as if not more important then your lens :)

Get out there and shoot.

-Blayre


After the incredible success of Ian Lee’s “So Nice to Meet You” music video, the team was called back for a second project on Je Ne M’en Fais Pas. This time around we wanted to introduce a slightly more complex concept which would offer the audience more to look at. Our idea was to have Ian Lee in an environment, with which he could interact, that would offer him a chance to reciprocate his comical high-energy personality. Thus we all agreed the starting point should be the rental of the biggest lesbian bar in Montreal… Le Drugstore. Le Drugstore offers many vividly stylish sections of which to create many various types of interesting situations. The place has something like 5 levels, two big patios, a disco floor, a NYC Subway entryway, and way too many bars to count! The location scouts nailed it on this one as we really walked into a situation with very little limitations!

The idea was then developed to have Ian play a member of the bar staff who is simply fed-up with his existence in this line of work. As he arrives to his morning shift with his damaged smokey vehicle, you instantly catch on to his negative vibe. Then as he proceeds to enter into work, and the music begins, we get to watch Ian put a disruptive yet comically contagious spin on his everyday work routine - It’s a ton of fun to watch!

Working with guys like Ian Lee, Derek Dugas (Director), Claude La Vertu (Production Manager) and Josh Baluyot (Key Grip, Director’s Assistant) is a real treat. Their level of professional dedication and mutual desire to create quality work quickly engaged an extremely focused yet enjoyable mentality which we basically coasted on throughout the whole two day shoot. It really flew by! When I look back it’s hard to understand how we did so much in such a short span of time! Now I haven’t mentioned one of the most important KEY components to the success of this production, and that is the 30-50 volunteer extras we had on set for two 12 HOUR DAYS! I must say that without their involvement there’s no way we could’ve accomplished what we did so efficiently. I’m so proud of everyone who participated in this music video.

My boy Emilio Tremblay (John Nathaniel, Producer) was hilarious as he brought a crazy chameleon-esque comedic factor to the project that kept me smiling throughout - thanks John for your crazy antics :)

Overall this project was very fulfilling and I’m very glad to have been given the opportunity to work on it as a DOP and Editor.